Making a home dashboard
Having a place to go home helps me reset to get an overview of what is going on.
This is where I rely on the canvas plugin.
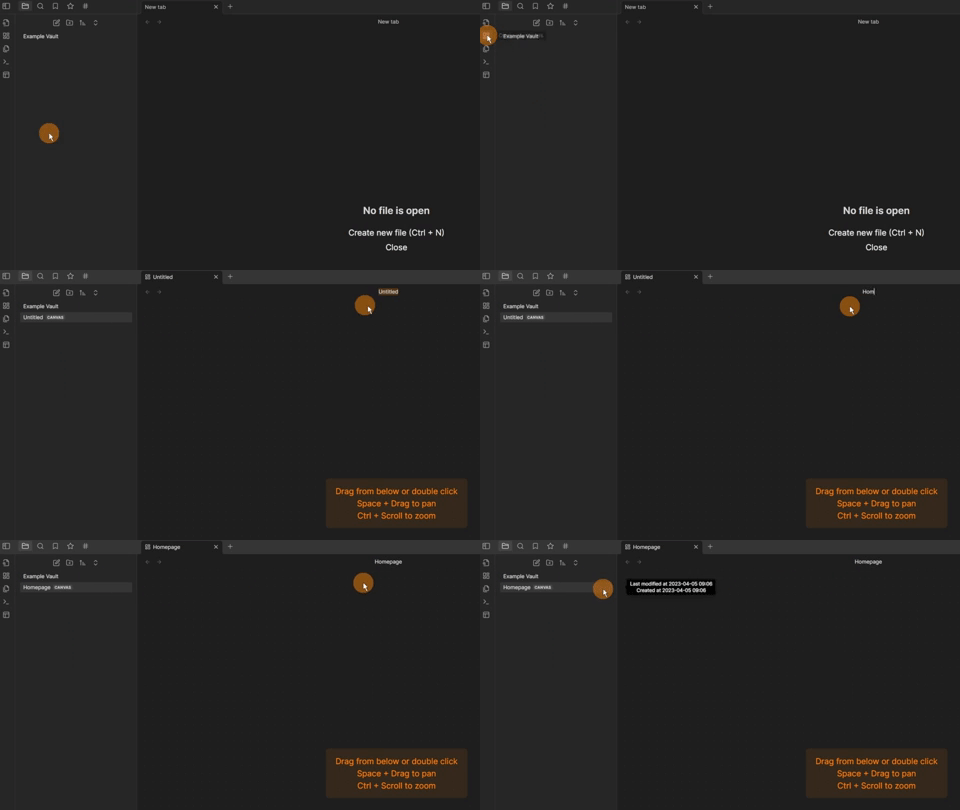
Combining the canvas with a query file.
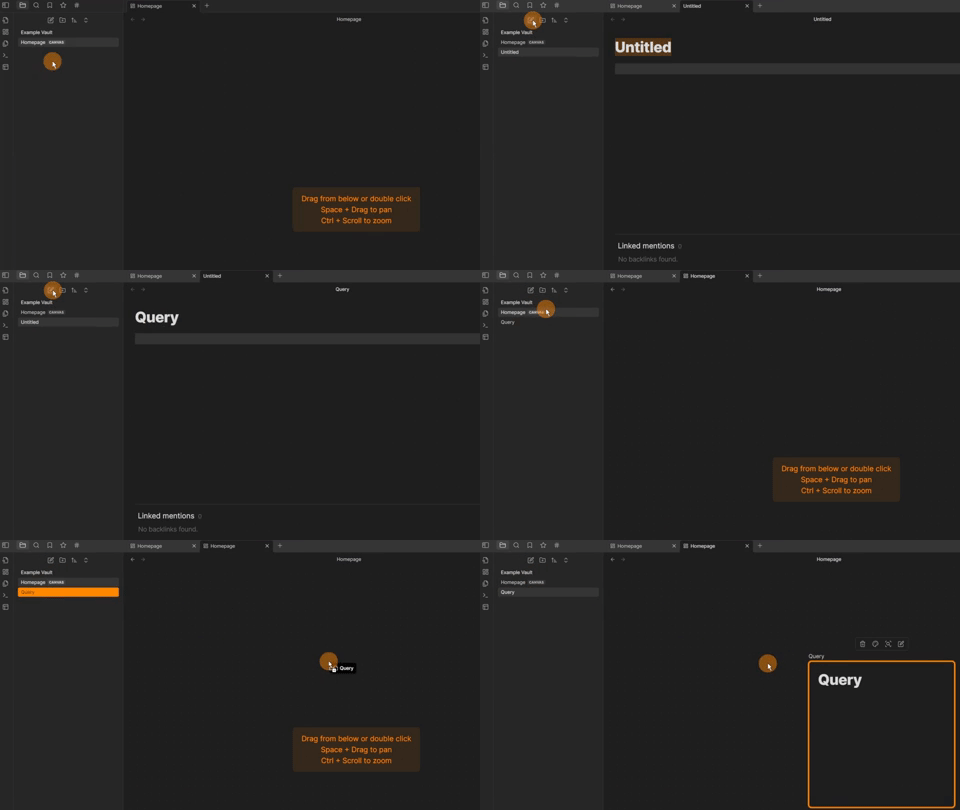
Then narrowing the cards in the canvas to the query sections I want.
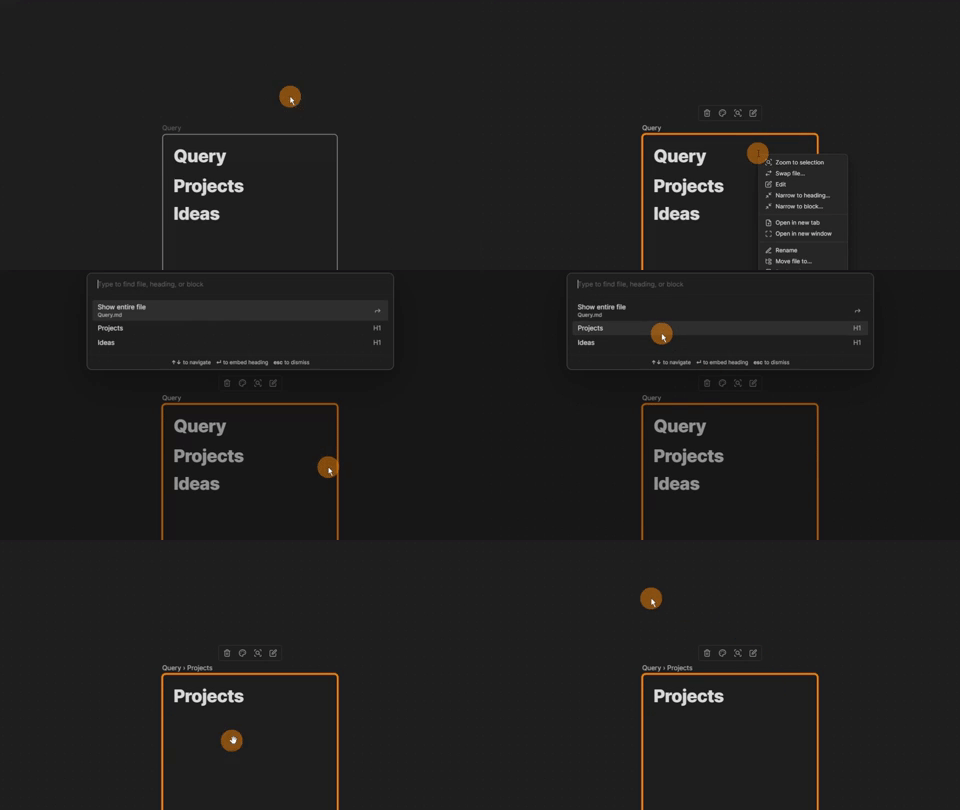
By holding ctrl while dragging a card you can duplicate it. Then narrow it to a different heading.

I keep the file name on the card so I can double click to quickly navigate to the heading or file.
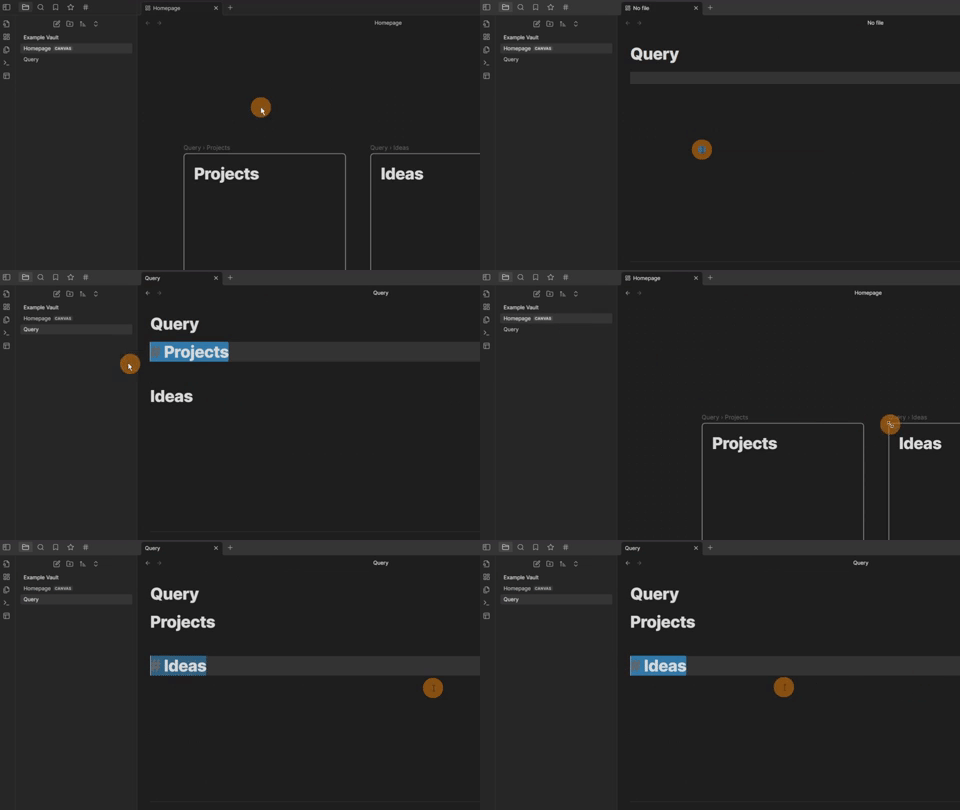
Creating a home workspace
Making this a workspace is done with the core plugin.
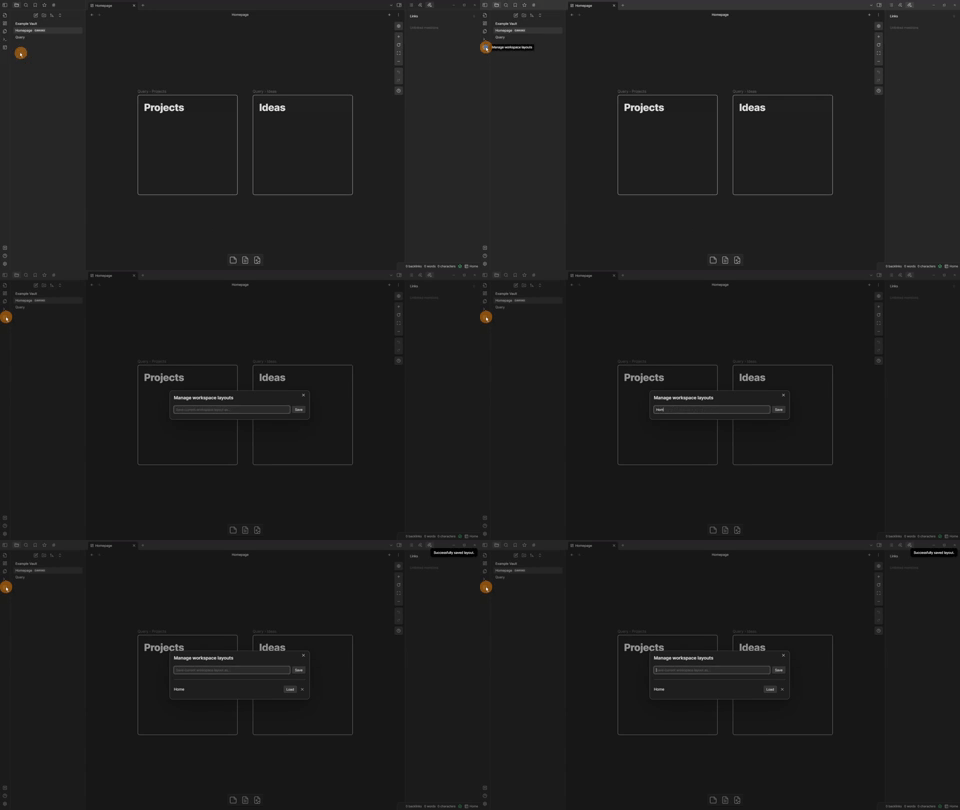
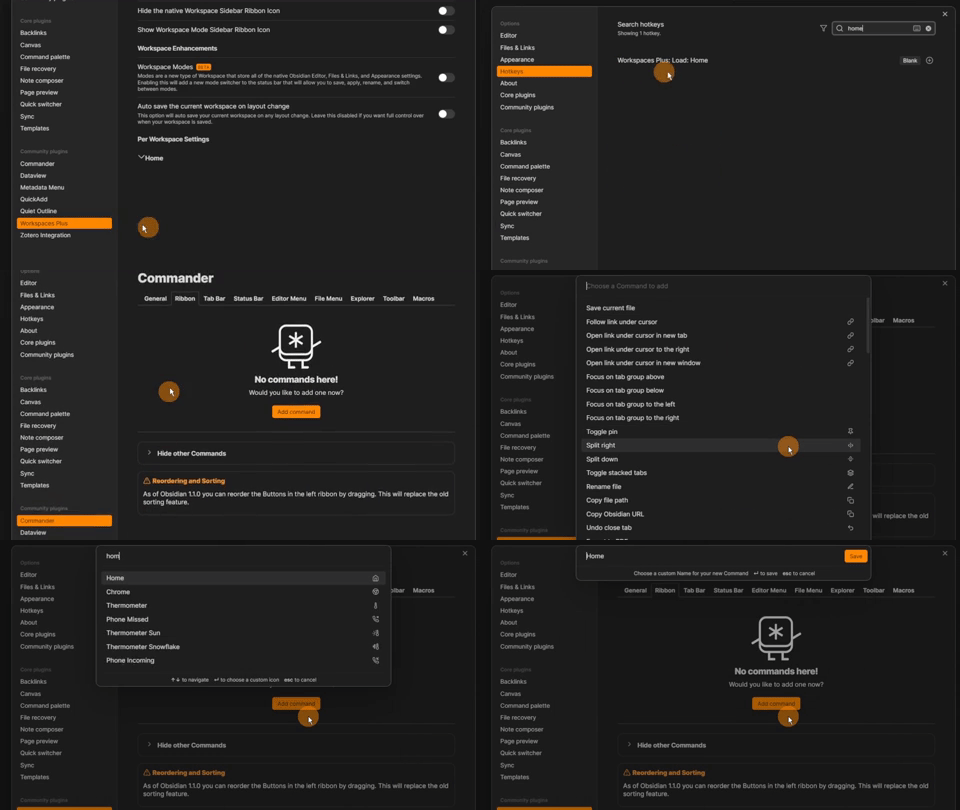
Using the workspace plus plugin gives the option to link a workspace to a hotkey.
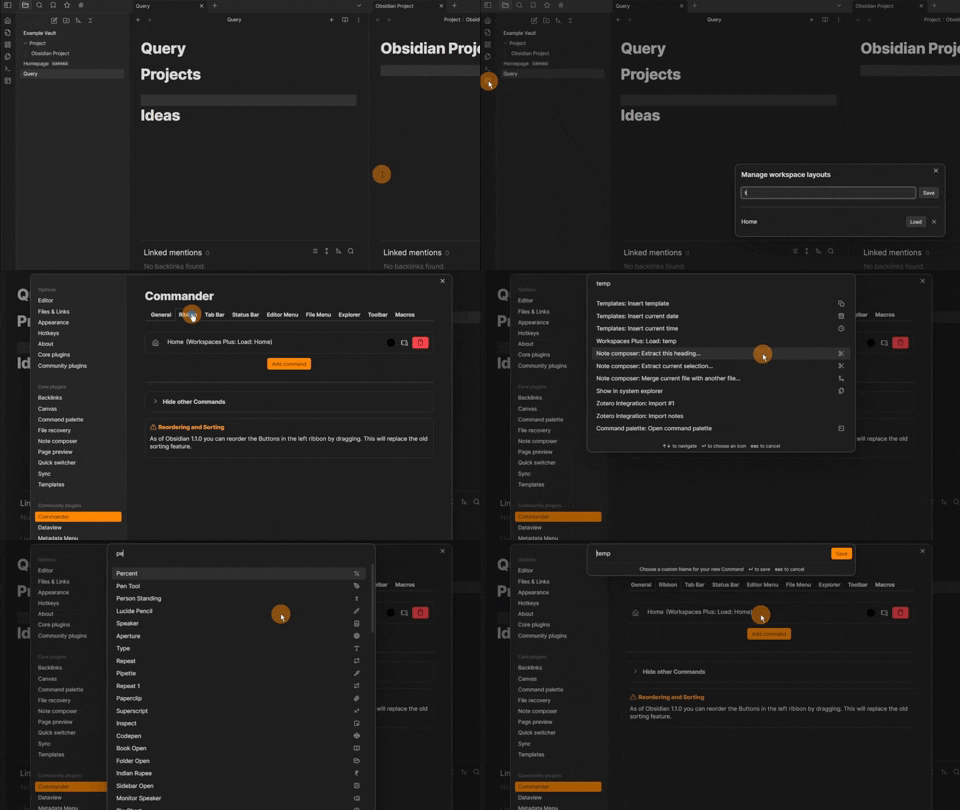
In my case, I link a workspace to a command in commander.
Now the home canvas can be accessed by the home button in the ribbon.
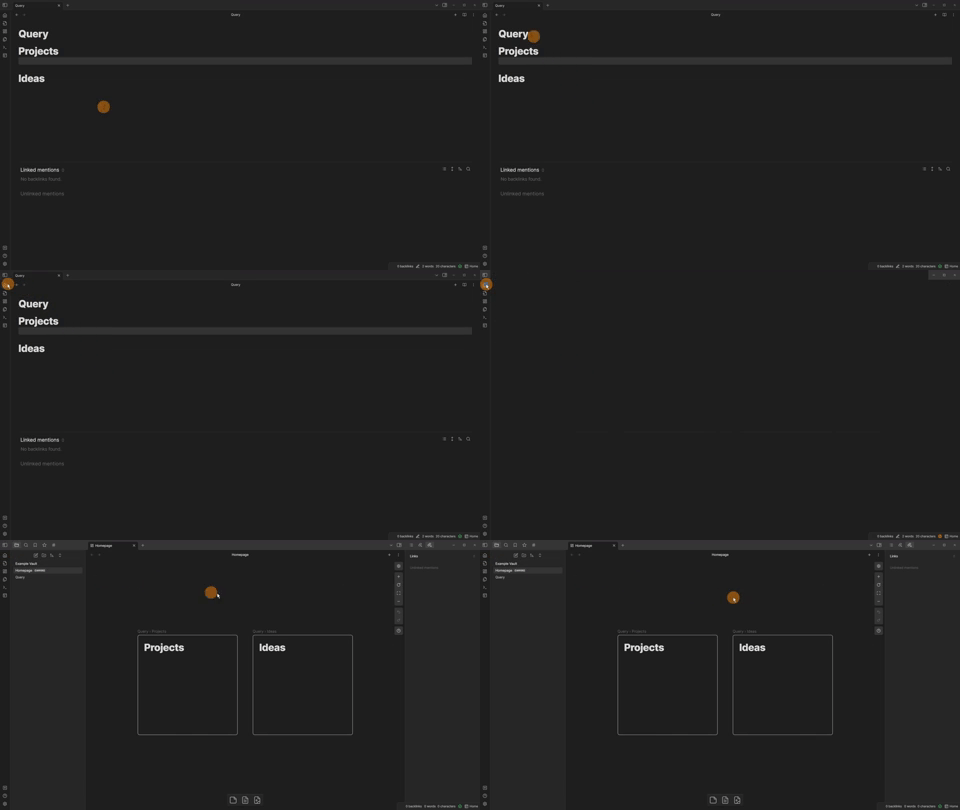
This can be repeated for other workspaces. I typically have a temporary or ‘temp’ workspace.
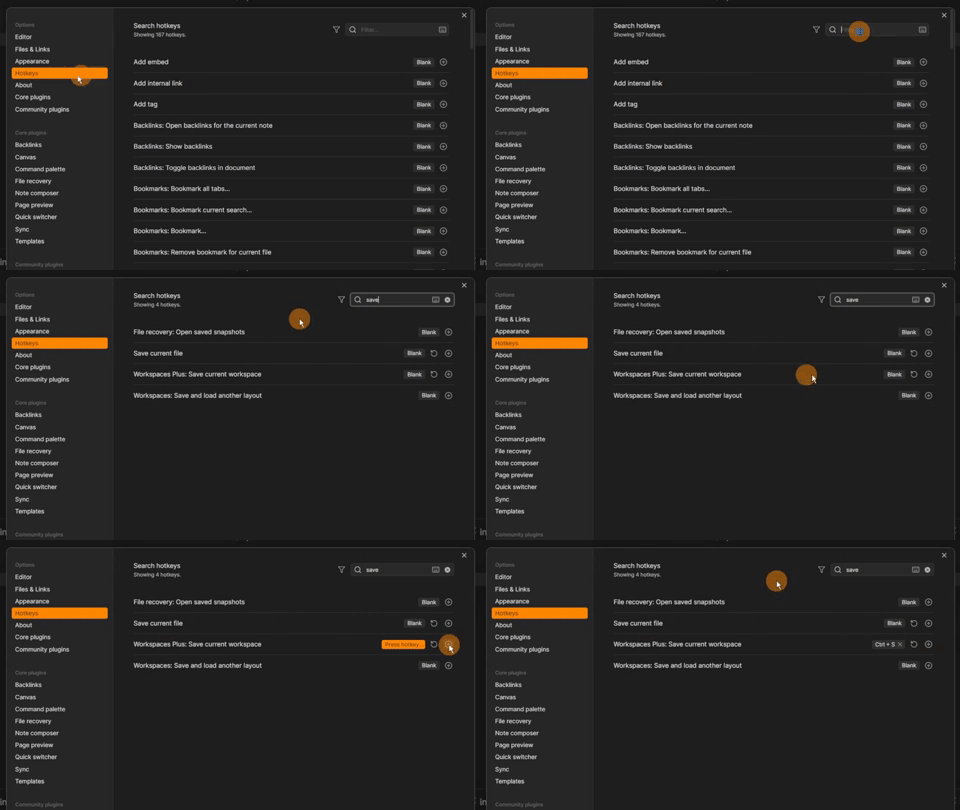
Changing the save workspace hotkey means I can save my ‘checkpoint’ to the temp file. My preference is `ctrl + s`
For a clearner ribbon I remove all commands I wont use in the appearance settings.
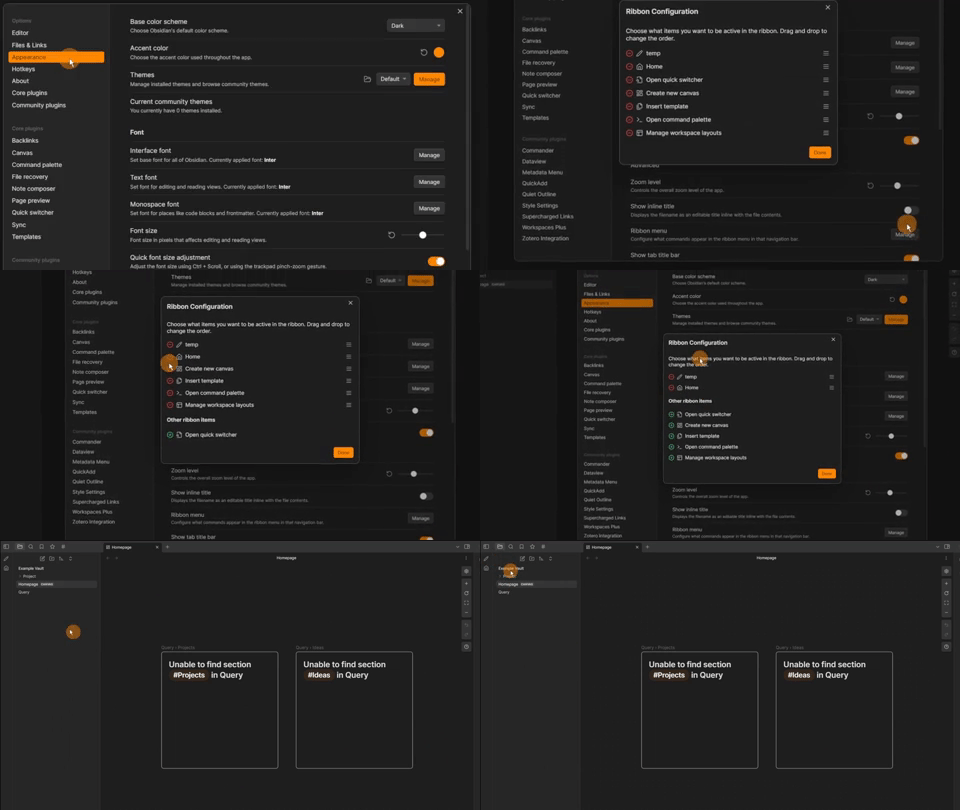
Removing ribbon commands does need to be done for each workspace as all settings are saved.
Setting up the queries
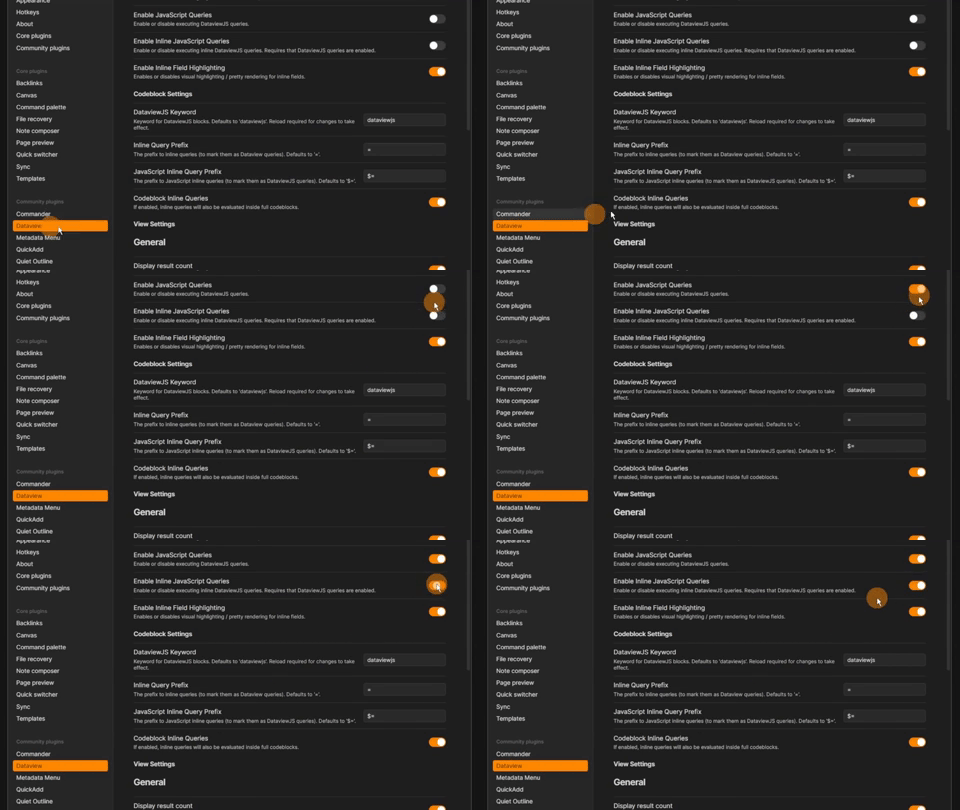
Before creating any queries I turn on the dataview js option. This allows javascript to be used. My main use case is so other plugins can use all of dataview’s features.
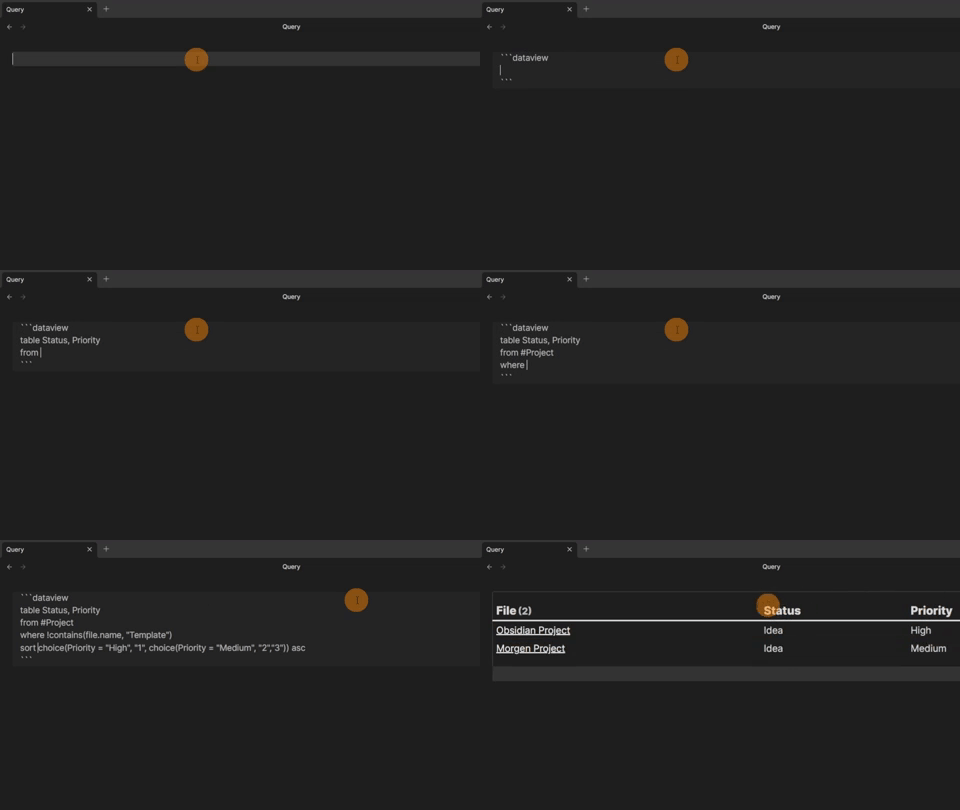
Projects are the main thing I want to see. So I go through the dataview process.
- Type = table
- Information = status and priority
- Source = from project tag
- Filter = remove template files
- Sort = High priority down to low
I also like to rename my table views so I know what I am looking at.
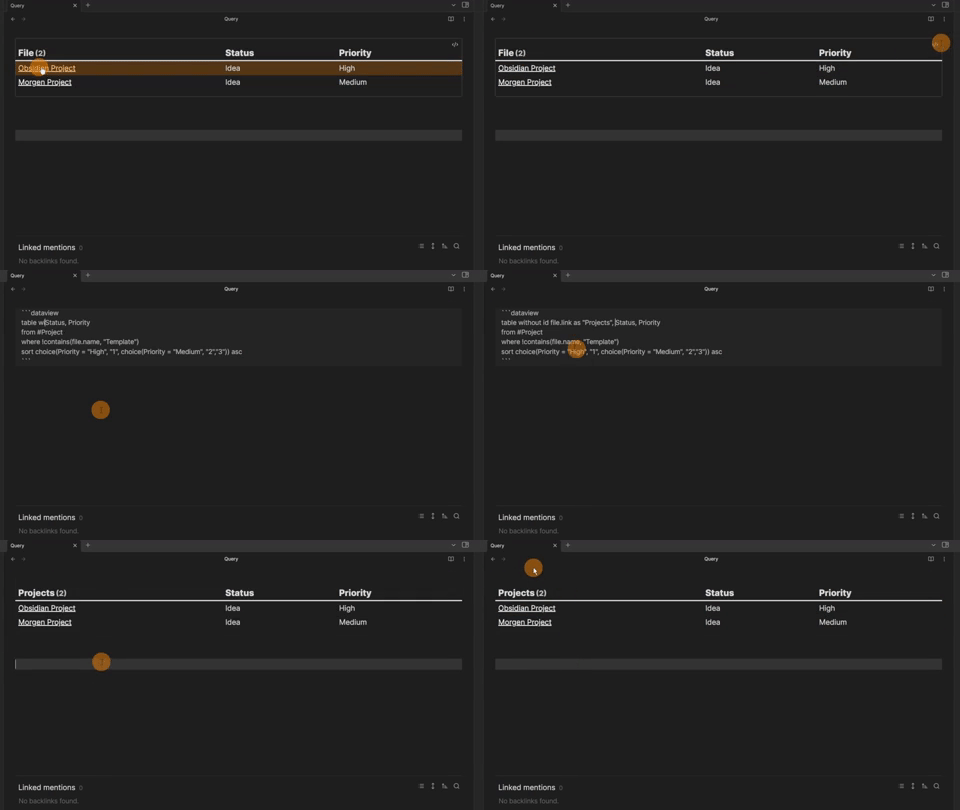
` ` `dataview
table without id file.link as “Projects”, Status, Priority
from #Project
where !contains(file.name, “Template”)
sort choice(Priority = “High”, “1”, choice(Priority = “Medium”, “2”,”3″)) asc
` ` `
Adding table options
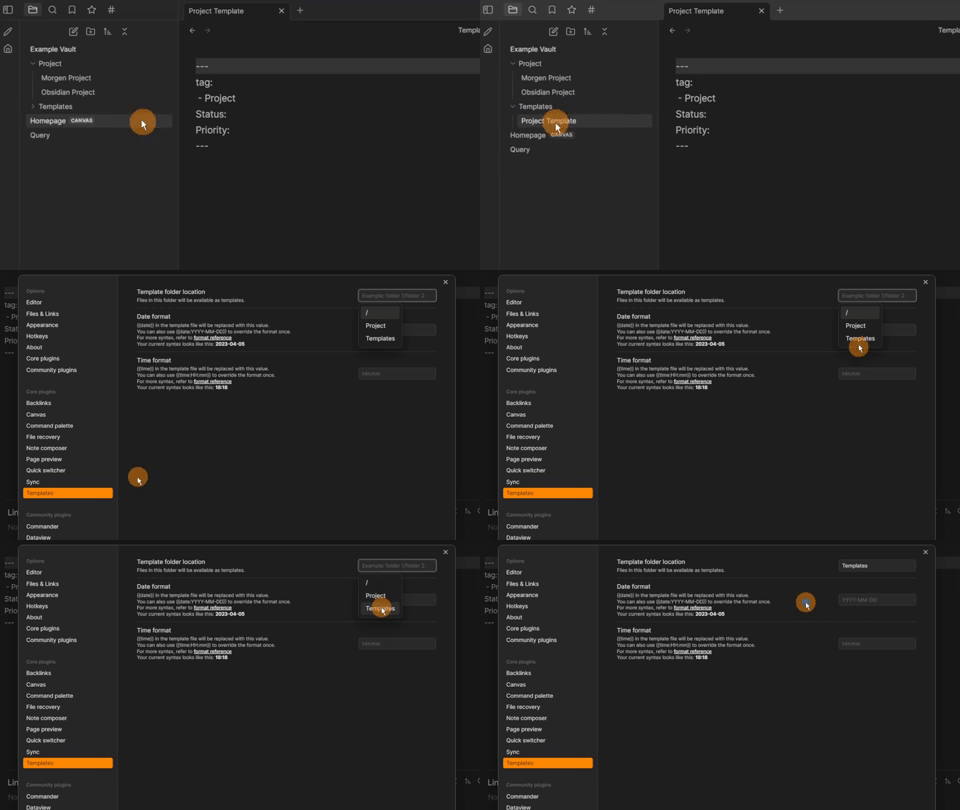
Each file tagged with Project will now appear in the query. To make sure it is always included I add that to my project template.
For the status and priority information, I also add it to the template.
As the status and priority information is the frontmatter I can make customizing them easier with metadata menu. First I create a project class.
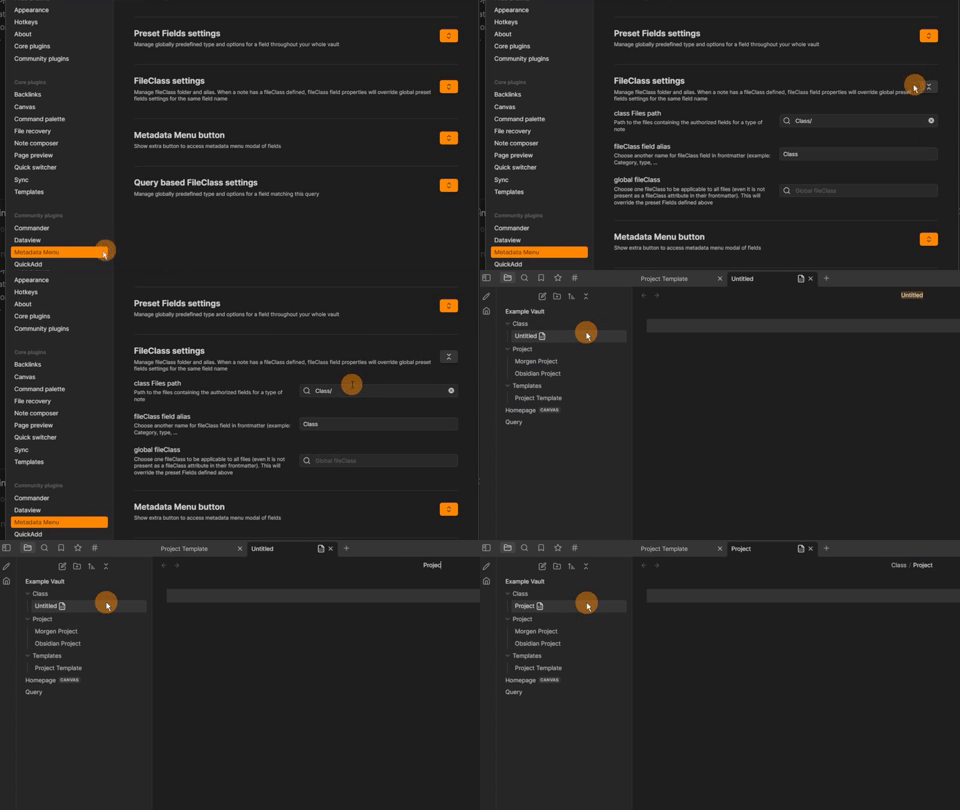
As the status and priority information is the frontmatter I can make customizing them easier with metadata menu. First I create a project class.
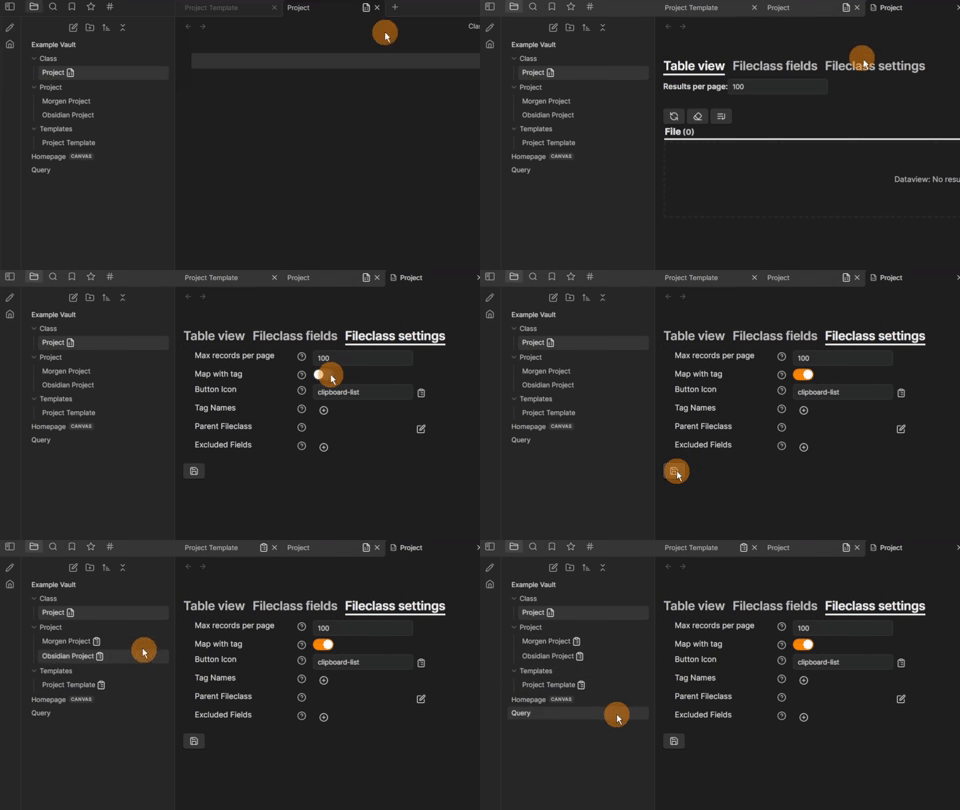
As the status and priority information is the frontmatter I can make customizing them easier with metadata menu. First I create a project class.
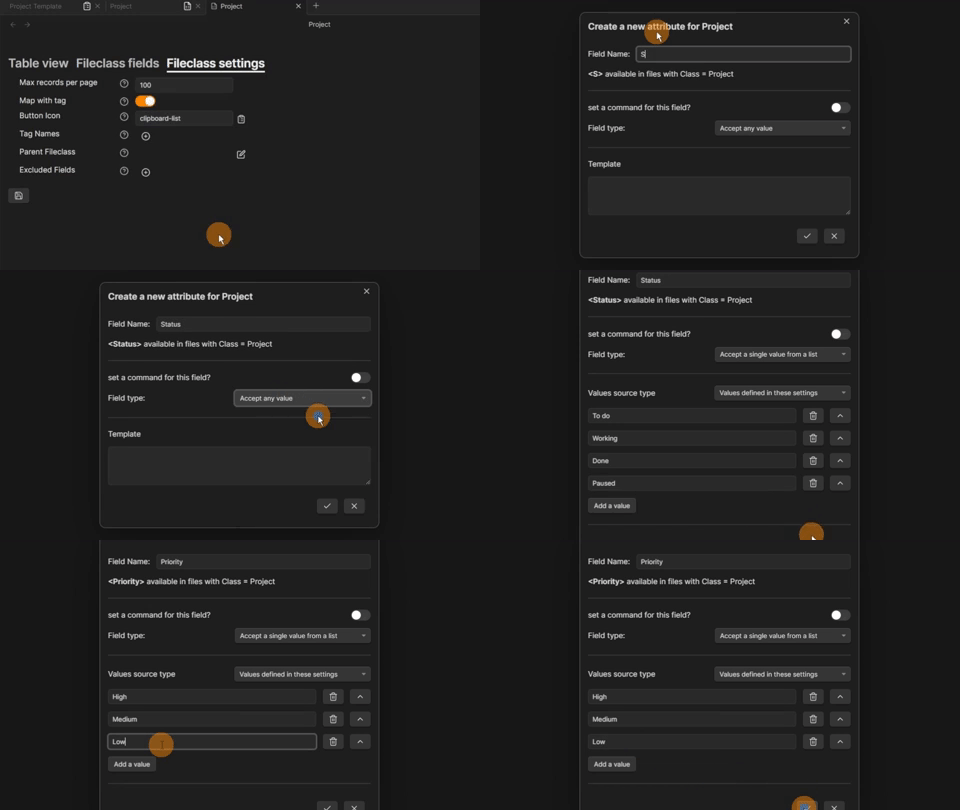
As the status and priority information is the frontmatter I can make customizing them easier with metadata menu. First I create a project class.
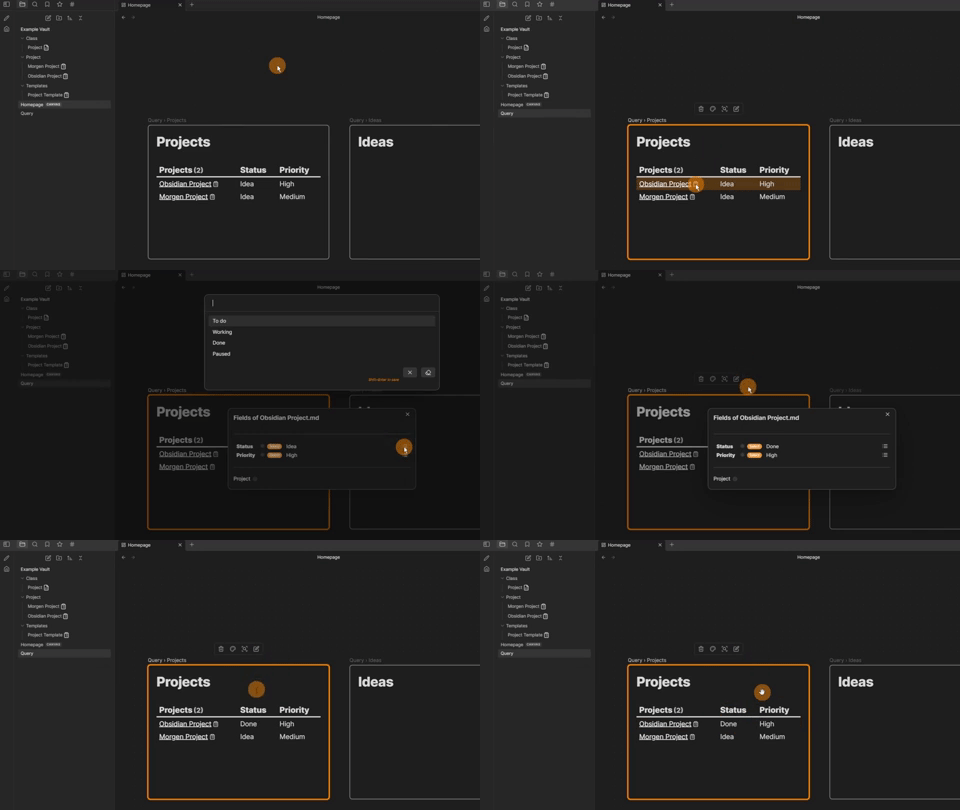
Creating quick add options
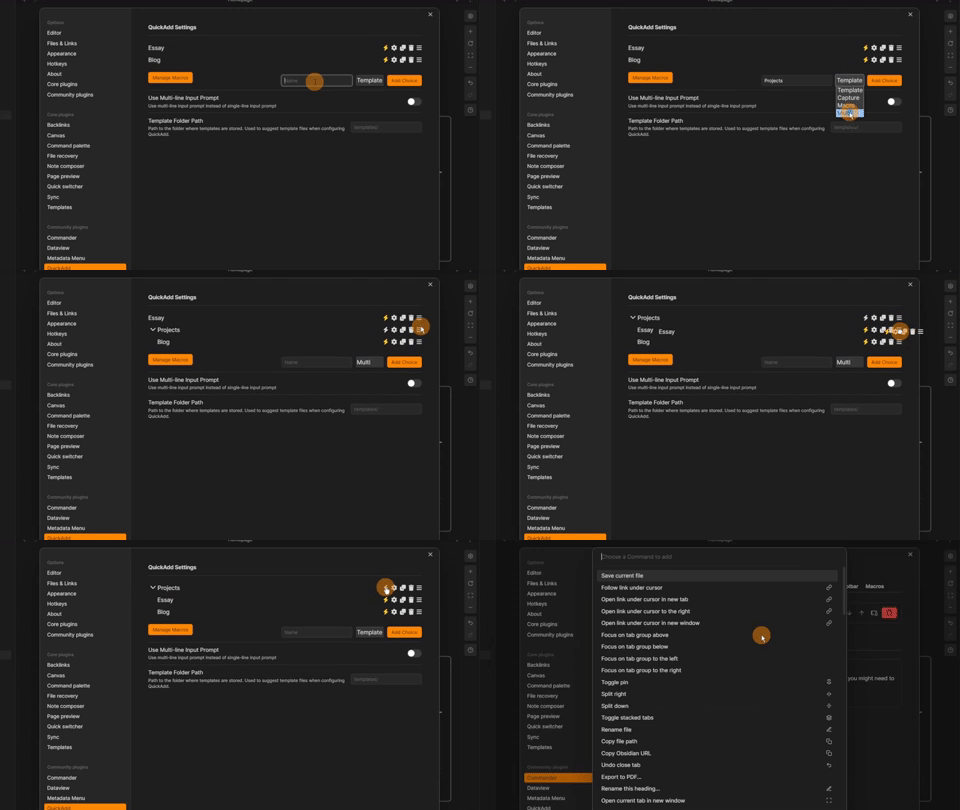
Combining the quick add plugin with commander allows for project to be created faster. First we need a quick add.
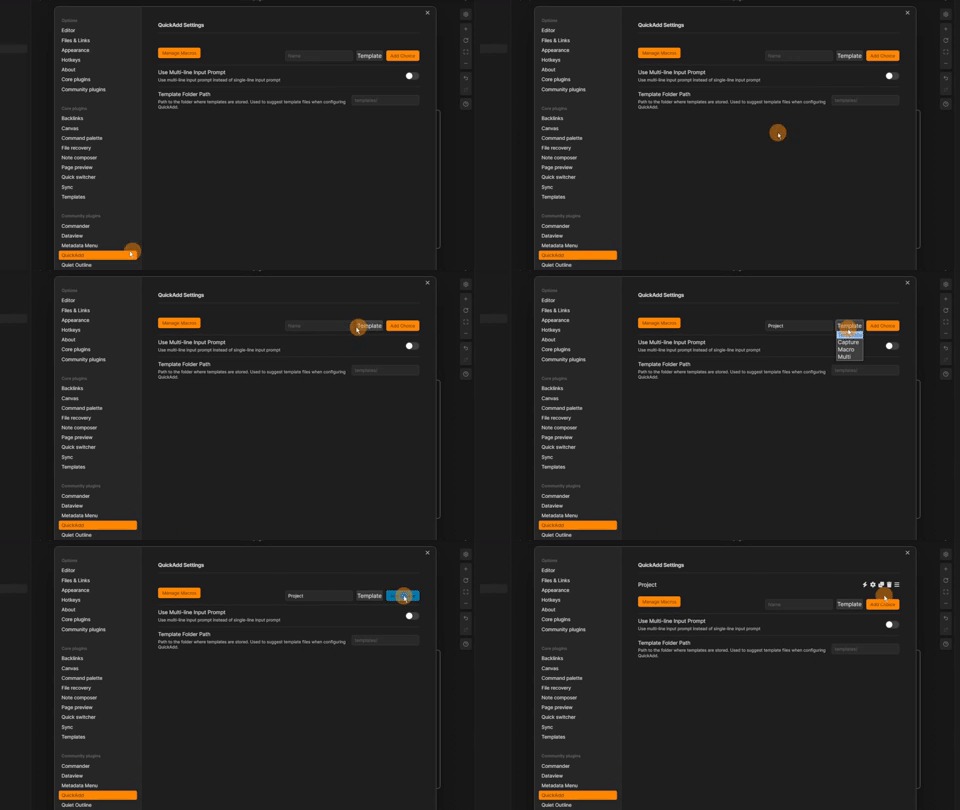
Attach the template file.
Select the folder location for the new project.
This for me is the project folder.
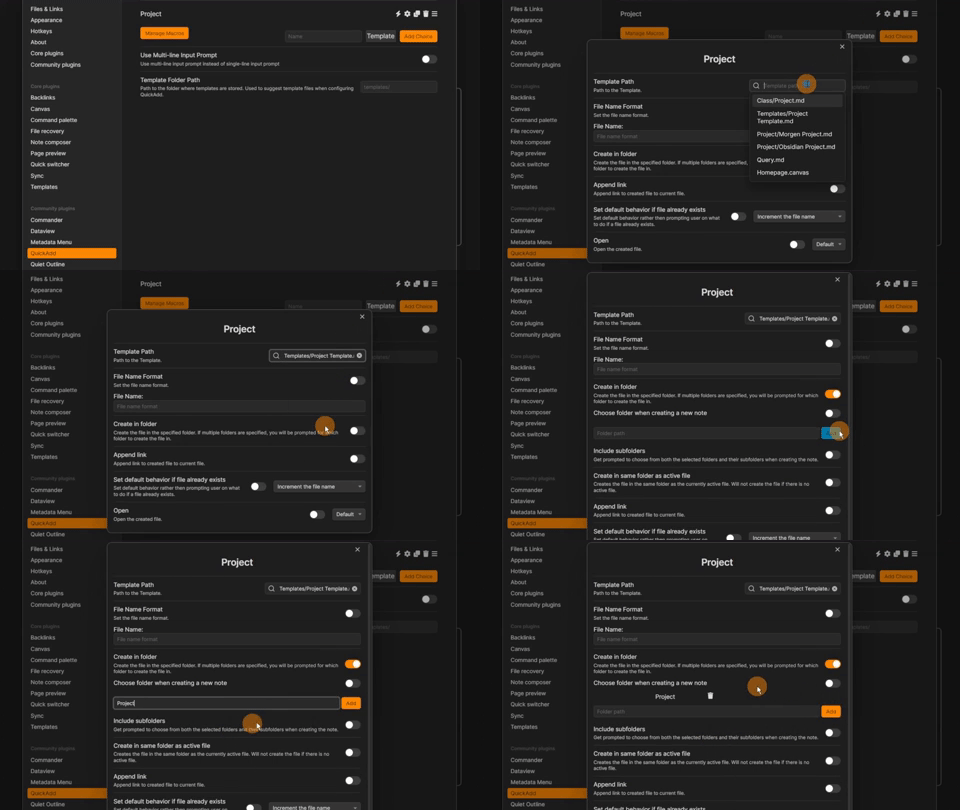
By clicking the lightning bolt, the quick add becomes it’s own command.
Using commander, you can turn the quick add into a button you can push.
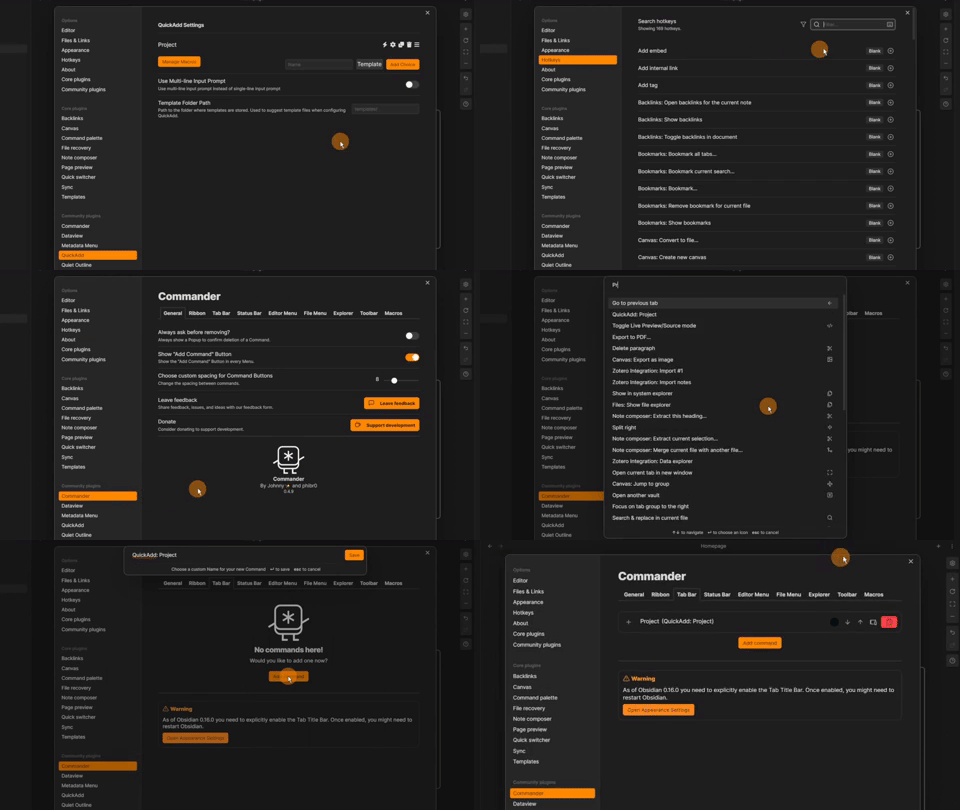
However, if there are lots of types of projects, I add the quick add option to the command instead giving me a drop-down selection of the templates.
“QuickAdd: Run QuickAdd”
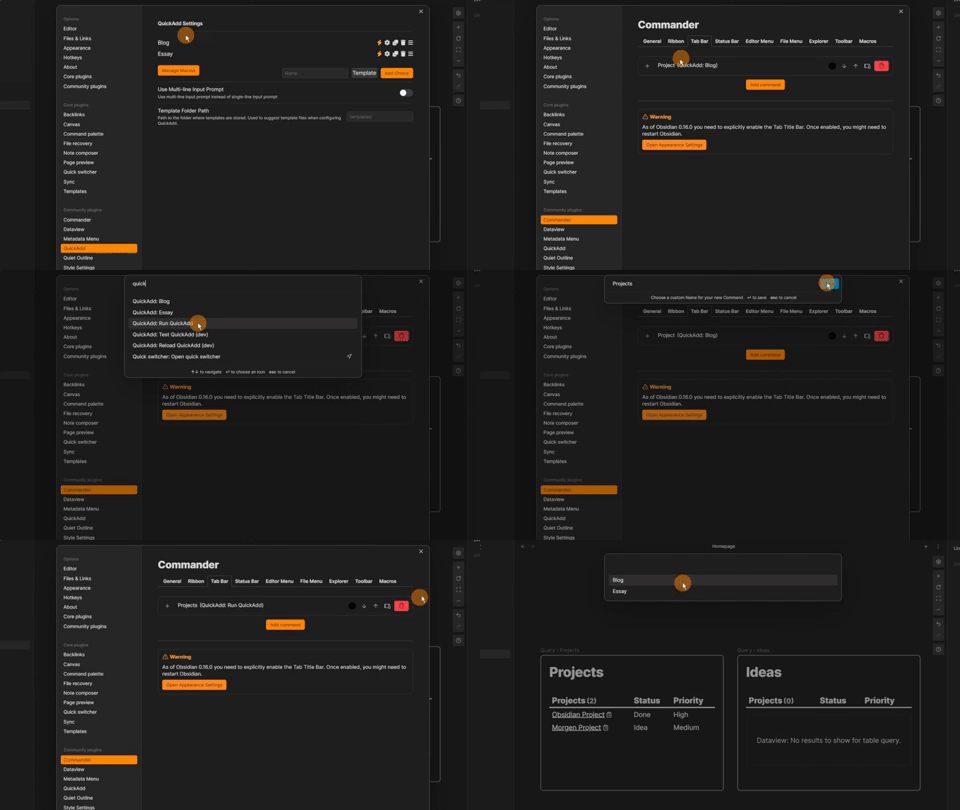
This can be made easier with the quick add multi-option.
This acts like a folder.
