Obsidian dataview for beginners

Install the dataview plugin

Open the Obsidian Settings

Click on the Settings icon in the bottom left of the screen.

Example note settings
Open the settings menu

Go to the Community plugins

Click on on the Community plugins tab in the left menu.

Push Turn on community plugins.

Community plugins tab

Browse community plugins

Type dataview in the search bar.

Click on the dataview plugin.

dataview browse
Plugin browse screen

Install dataview

Push install in the plugin window.

install dataview
Install dataview

Enable dataview

Push enable in the plugin window.

enable dataview
Enable dataview

Dataview settings

Push options in the plugin window.

dataview settings
Dataview settings

Activating JavaScript

Turning on JavaScript Queries and inline queries will allow for dataviewjs.

JavaScript settings

Automatic task completion

Enabling automatic completion means ticking tasks in dataview adds a completion date to the task.

Using emoji shorthand can be enabled.

Task completion and emoji shorthand

Add a dataview code block

Open a note

Create or Open a note in the Obsidian vault.

Example note

Add a code block

Type ` into Obsidian 3 times and 3 more should appear below.

code block
Backticks
Keyboard location

Make a dataview codeblock

Type dataview next to the first line.

For JavaScript type dataviewjs.

dataview codeblock
dataview codeblock

Edit the codeblock

Click on the edit this block at the top right, to enter the edit window.

Edit the code block icon

Create a query

Add a type

Type table, list, or task adding a blank line underneath.

table, list and task source code and result

Add a field

Type file.ctime next to the type.

Fileds can be implicit, automatically added, or created, added by a user.

field query
3 dataview results

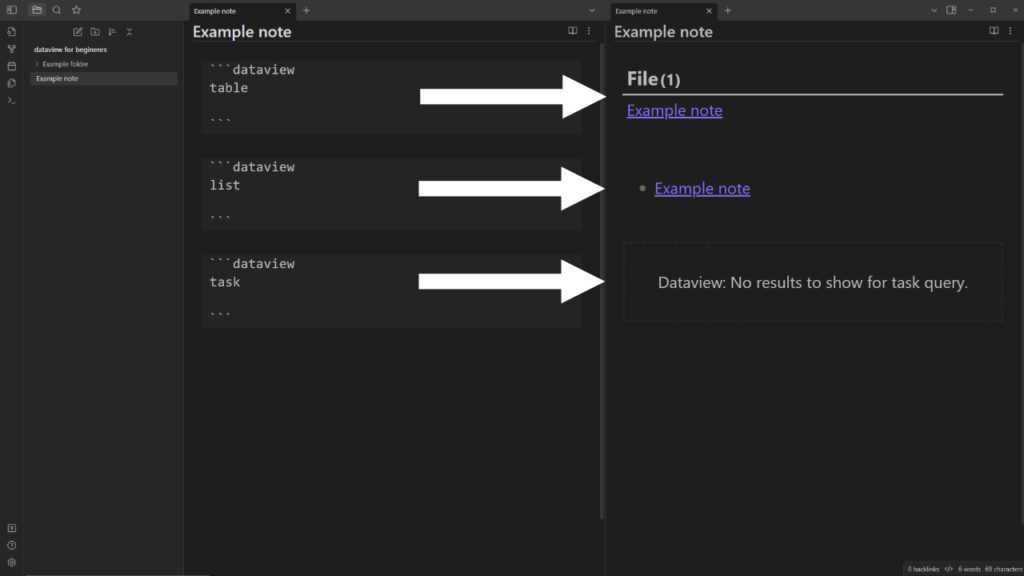
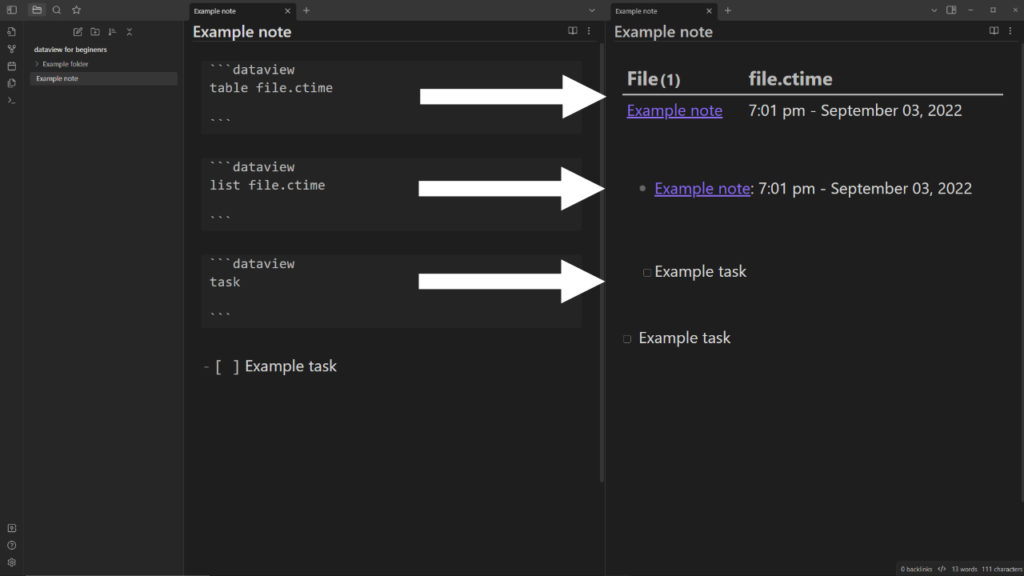
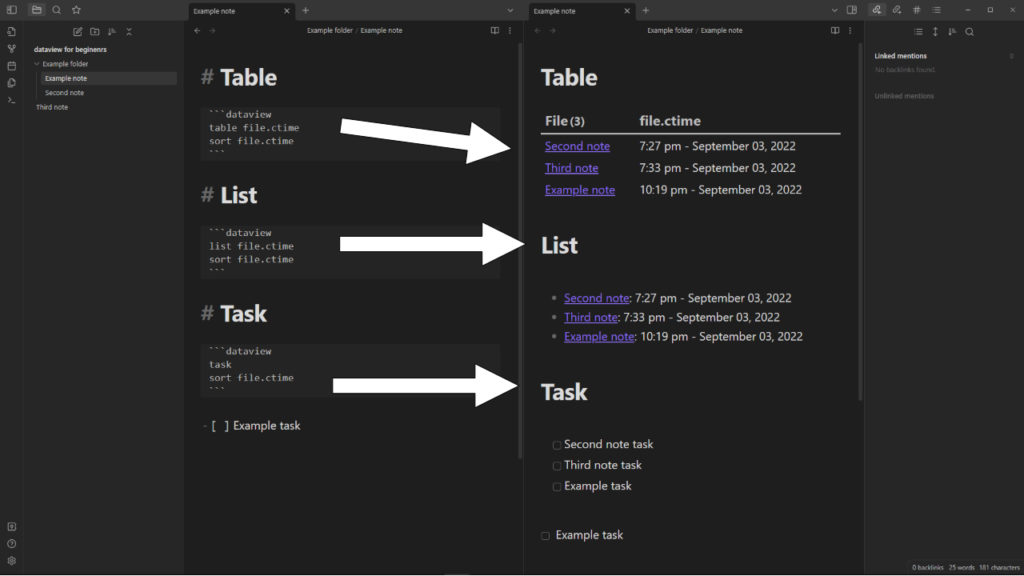
Tasks are blocks, and thus don’t have implicit file information like file.ctime.

Adding a task at the bottom of the page makes it appear twice. One as a task and the other as a query result.
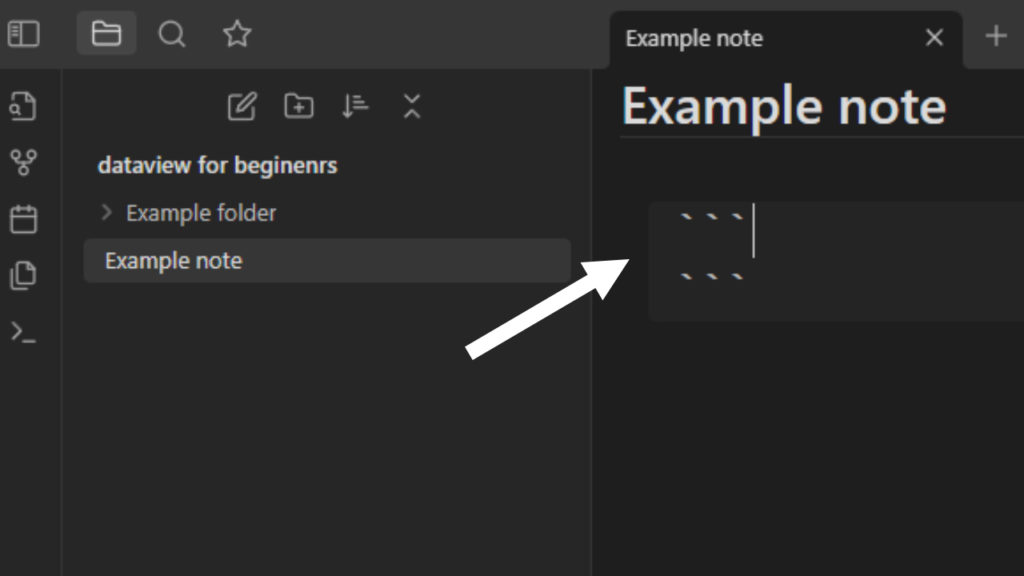
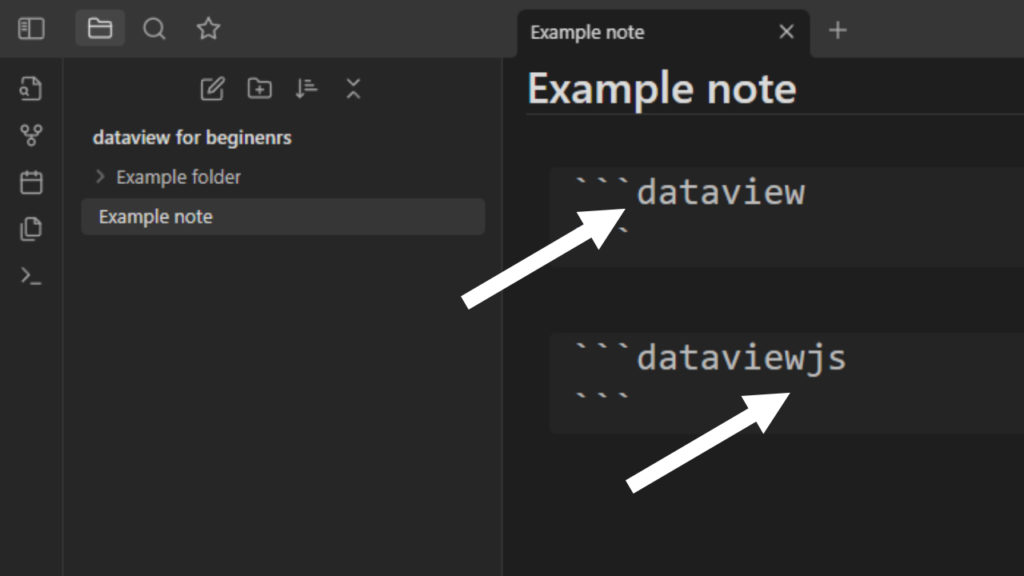
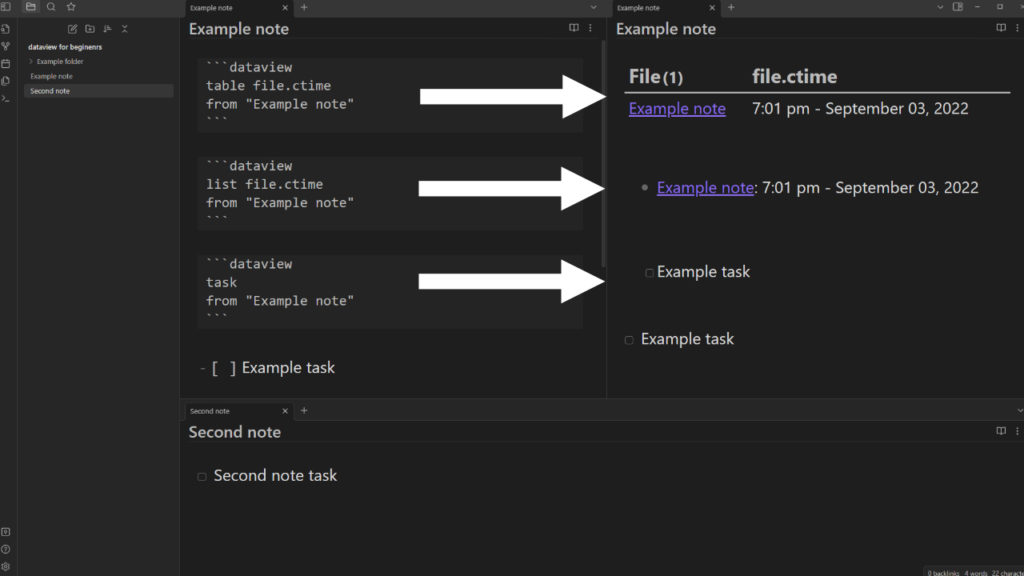
Add a source

Type from “Example note”.

Or put the name of your note in between the speech marks.

Notes without that name will not appear in the query results.

From source

The Second note isn’t included in the from source, so doesn’t appear in the query results.
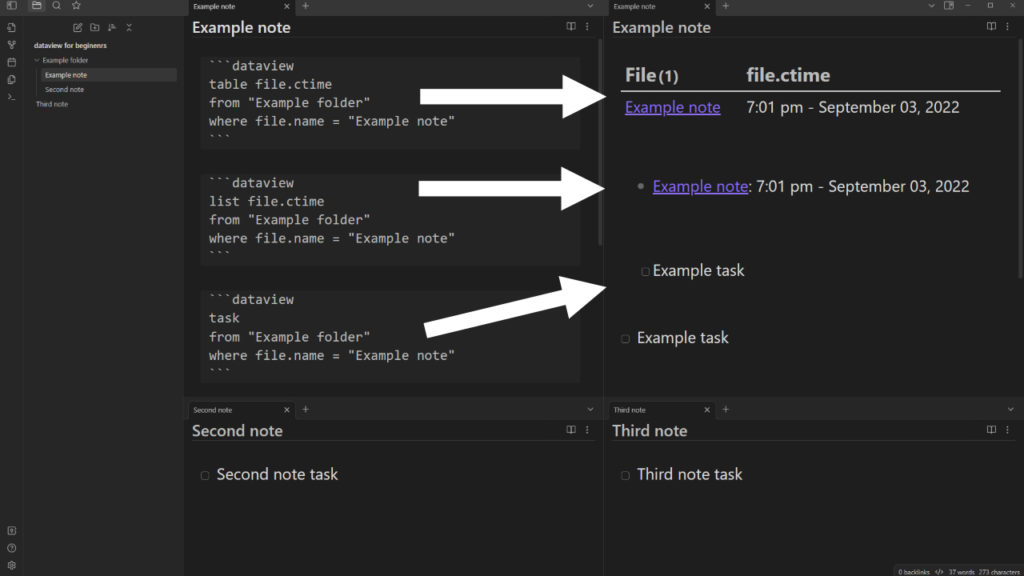
Add a where clause

Change the from source to “Example folder”.

Move the Example note and Second note into the Example folder.

Type where file.name = “Example note”.

Adding a where clause

The third note is excluded from the results due to the from criteria. Third note is not inside the Example folder. (It is also excluded by the where criteria)

The second note is excluded from the results due to the where criteria, not being named Example note.

Add a sort

Removing the from and where exclusion criteria show all the files.

Adding sort and a c.time sorts the results by the field in either ascending (asc) or descending (desc) order.

sorted queries
Sorted queries

Additional tips

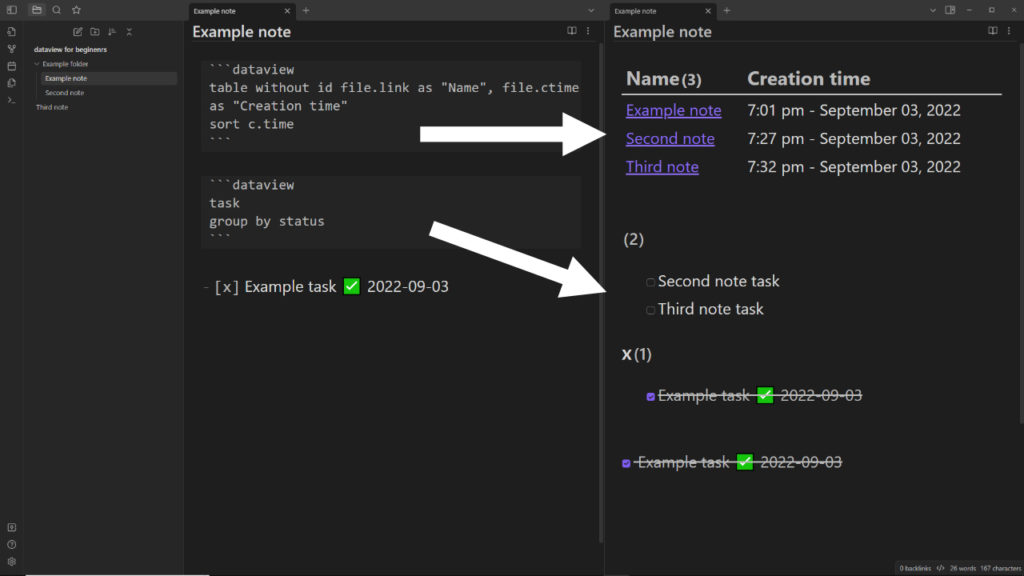
Add group by status in the task query to separate complete from incomplete tasks.

Rename table titles by adding as followed by your desired name in ” “.

To rename the first column add without id to remove the column. Then add your own first column e.g. file.link and rename that column.

Grouped search results and renamed table columns

Download this template

Have a pre-built vault.

Download the community vault

A vault full of community example and ideas.
FREE

Want to discuss this article ?

Due to mass bot and AI-generated comments, I have comments turned off for my website.

Feel free to tag me to further the discussion 😁

Twitter
Facebook
LinkedIn
Reddit
WhatsApp

About me...

Yes. That space background is my wallpaper. My first selfie turned out pretty good if I do say so myself.

I’ve been researching how we learn since I was 17, and now at 27 I’ve coached, taught and advised more activities than I thought existed.

Over the last 3 years, I’ve helped thousands learn technical software.

Now I’m all-in on sharing insights into educational science.